
Connecting Your AirGradient ONE to WiFi
Prerequisites
Before connecting your AirGradient ONE to WiFi, make sure you have:
A Compatible WiFi Network
Your WiFi network must meet the following requirements:
-
2.4GHz only (5GHz is not supported)
-
Must have active internet
-
No WPA Enterprise authentication
-
No captive portals (hotel/guest login pages)
-
No firewall blocking unknown devices (The monitor’s serial number = MAC address for whitelisting.)
A Smartphone, Tablet, or Laptop with WiFi
-
You will use this device to connect to the monitor’s hotspot and complete WiFi configuration.
Video Guides (Watch First if You Prefer Video Instructions)
If you’d rather follow video instructions instead of the written steps, use the one of the video guides below. These cover all onboarding methods: QR-code and manual WiFi selection.
QR Code vs. Manual Wi-Fi Selection – What’s the Difference?
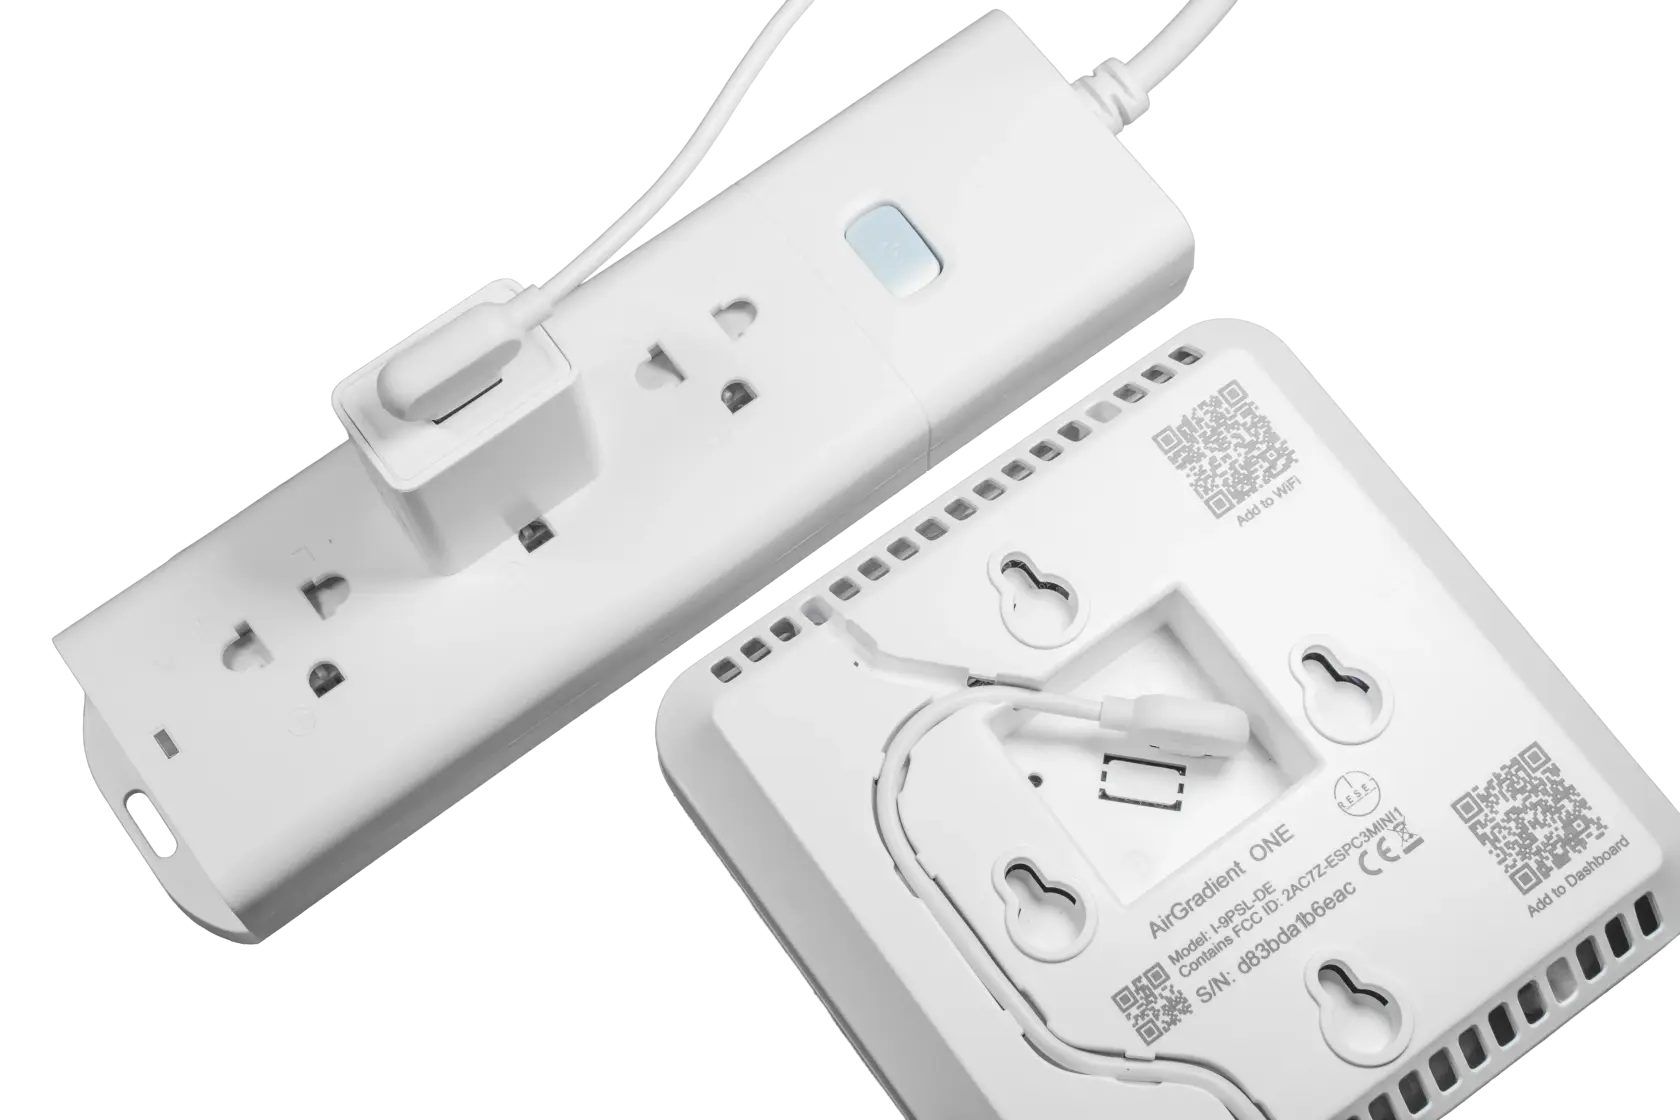
All pre-assembled AirGradient ONE units include a printed QR code on the enclosure.

Scanning it simply skips the step of manually searching for the hotspot and connects you directly to the device’s WiFi network:
airgradient-xxxxxxxxxxxx(Where xxxxxxxxxxxx is your device’s serial number. If you’re setting up a DIY kit, you may want to note down the Serial Number for dashboard onboarding later.)
DIY kit units do not have the QR code, but the setup process is identical – you just join the hotspot manually from your WiFi settings.
Regardless of which method you use, the actual WiFi configuration steps are the same, choose a video below based on your setup and preference:
Connect to WiFi – iOS
Connect to WiFi – Android
1. Connecting Your AirGradient ONE to WiFi
1.1 Power On
-
Plug the ONE into a stable USB-C power source. [Link to Power Requirements]
-
The device display will show initialization messages.

-
After booting, the screen will show the following message:
180s to connect to airgradient-xxxxxxxxxxxx
(Where xxxxxxxxxxxx is your device’s serial number. If you’re setting up a DIY kit, you may want to note down the Serial Number for dashboard onboarding later.)
This is the hotspot name.

1.2 Connect to the Device Hotspot
As mentioned in the Video Guides section above: All pre-assembled AirGradient ONE units include a QR code printed on the back of the enclosure. Scanning it connects you directly to the device’s WiFi hotspot. You can still join the hotspot manually if you prefer - the setup process is otherwise identical.
Option A: Scan the QR Code (pre-assembled units)
-
Scan the QR code on the back of the enclosure.
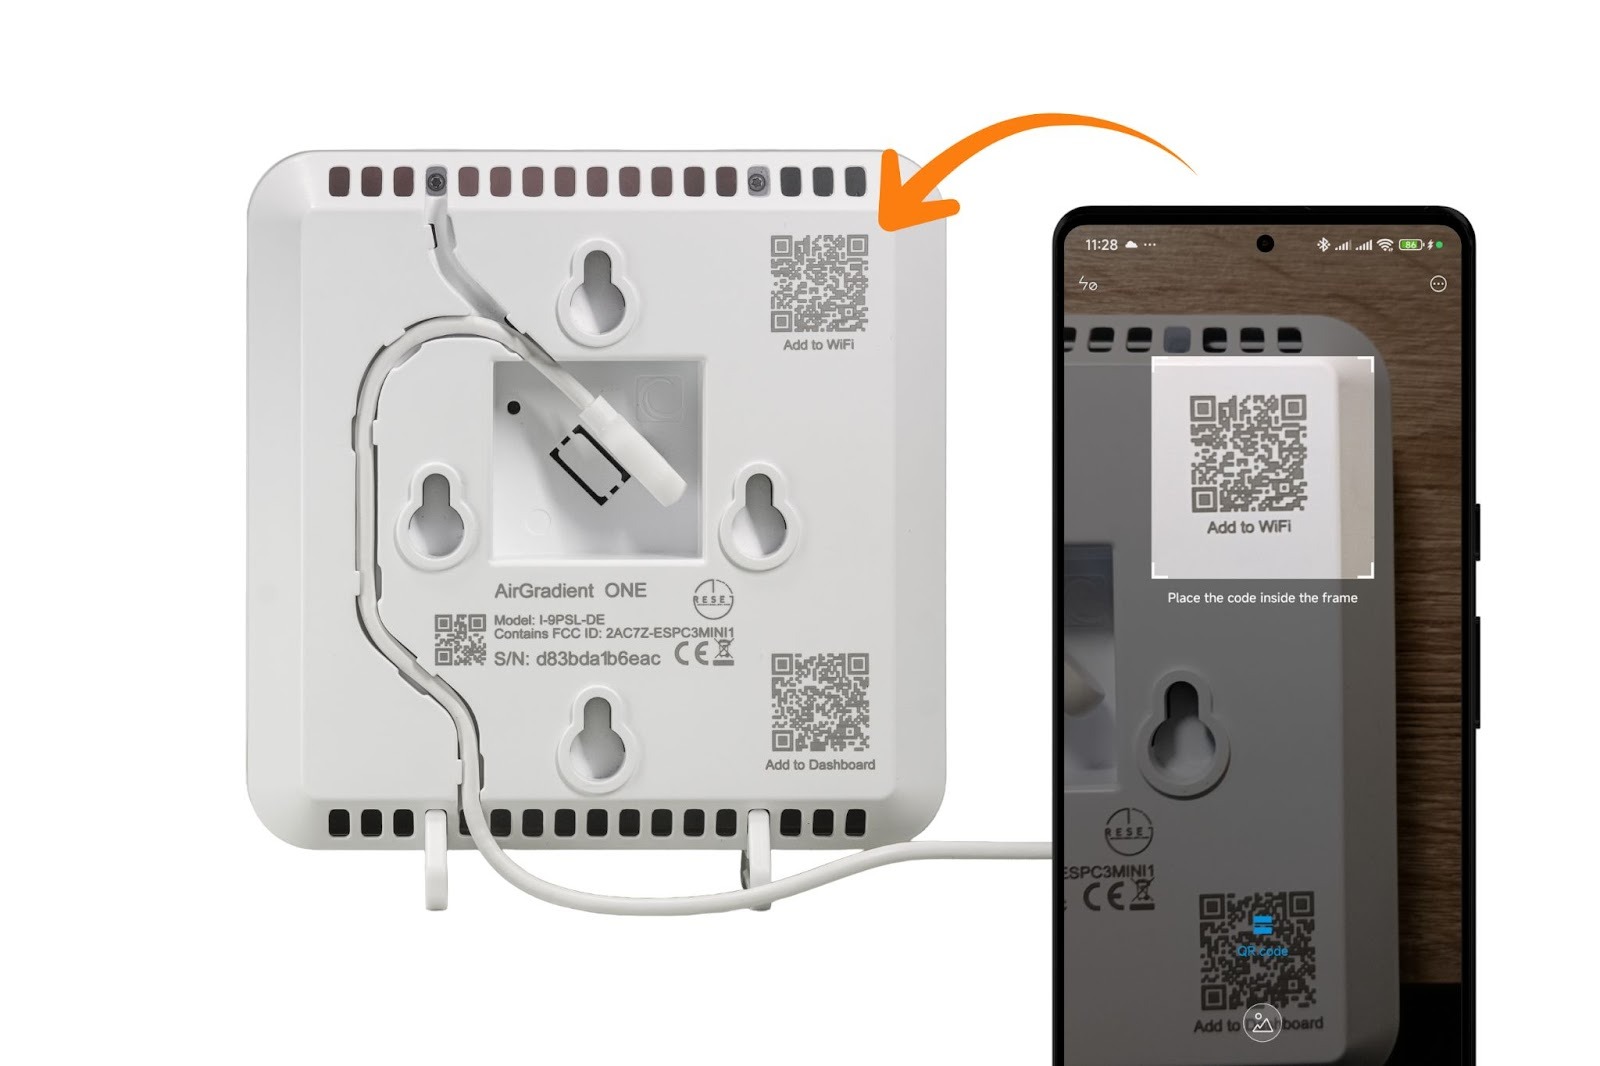
-
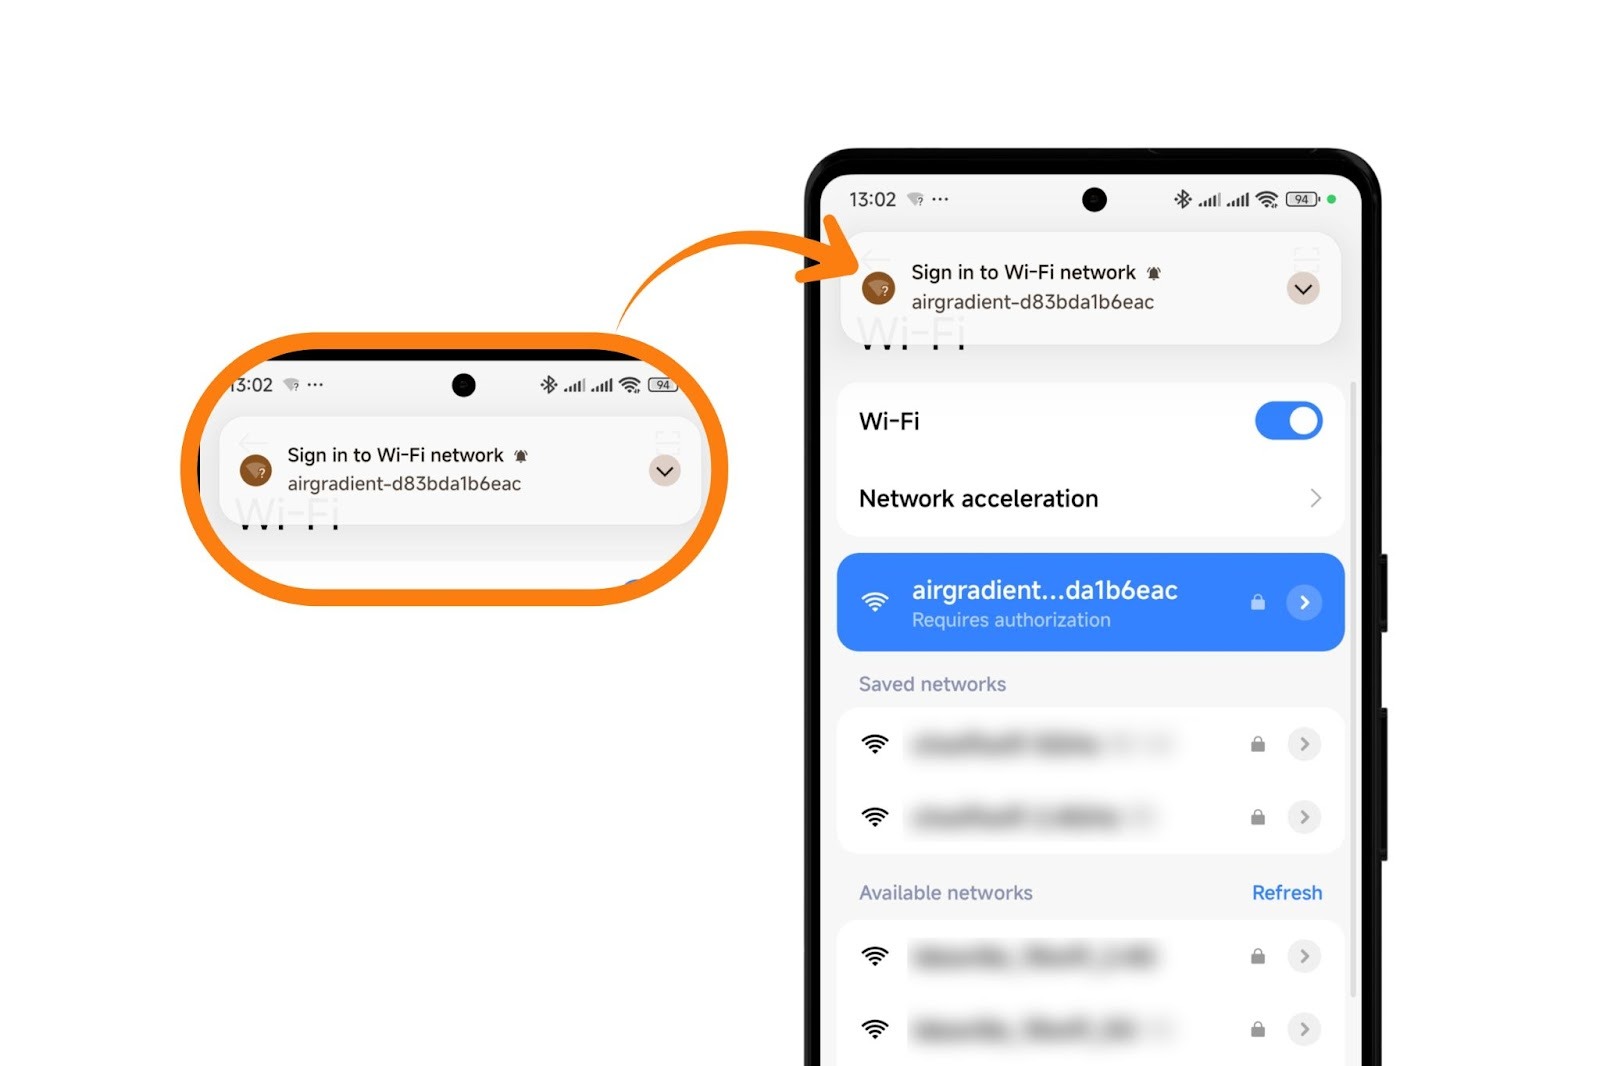
Your phone will prompt you to join the WiFi network:
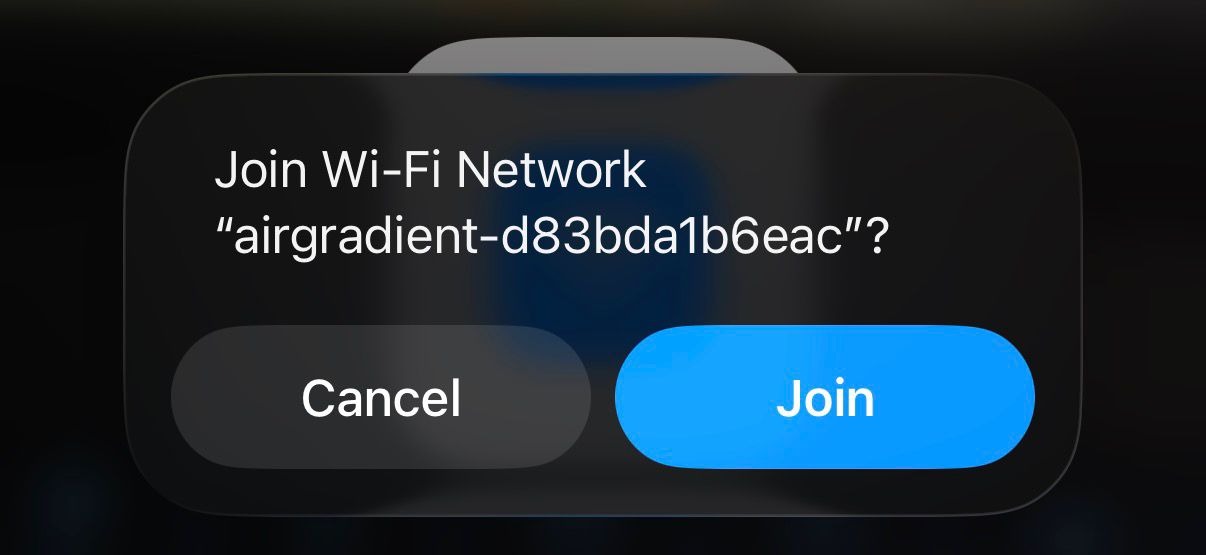
-
Tap Join. (this skips the step of manually locating the hotspot)
Option B: Join the Hotspot Manually (all units, including DIY kits)
-
Open your phone, tablet, or laptop WiFi settings.
-
Look for and select the network:
airgradient-xxxxxxxxxxxx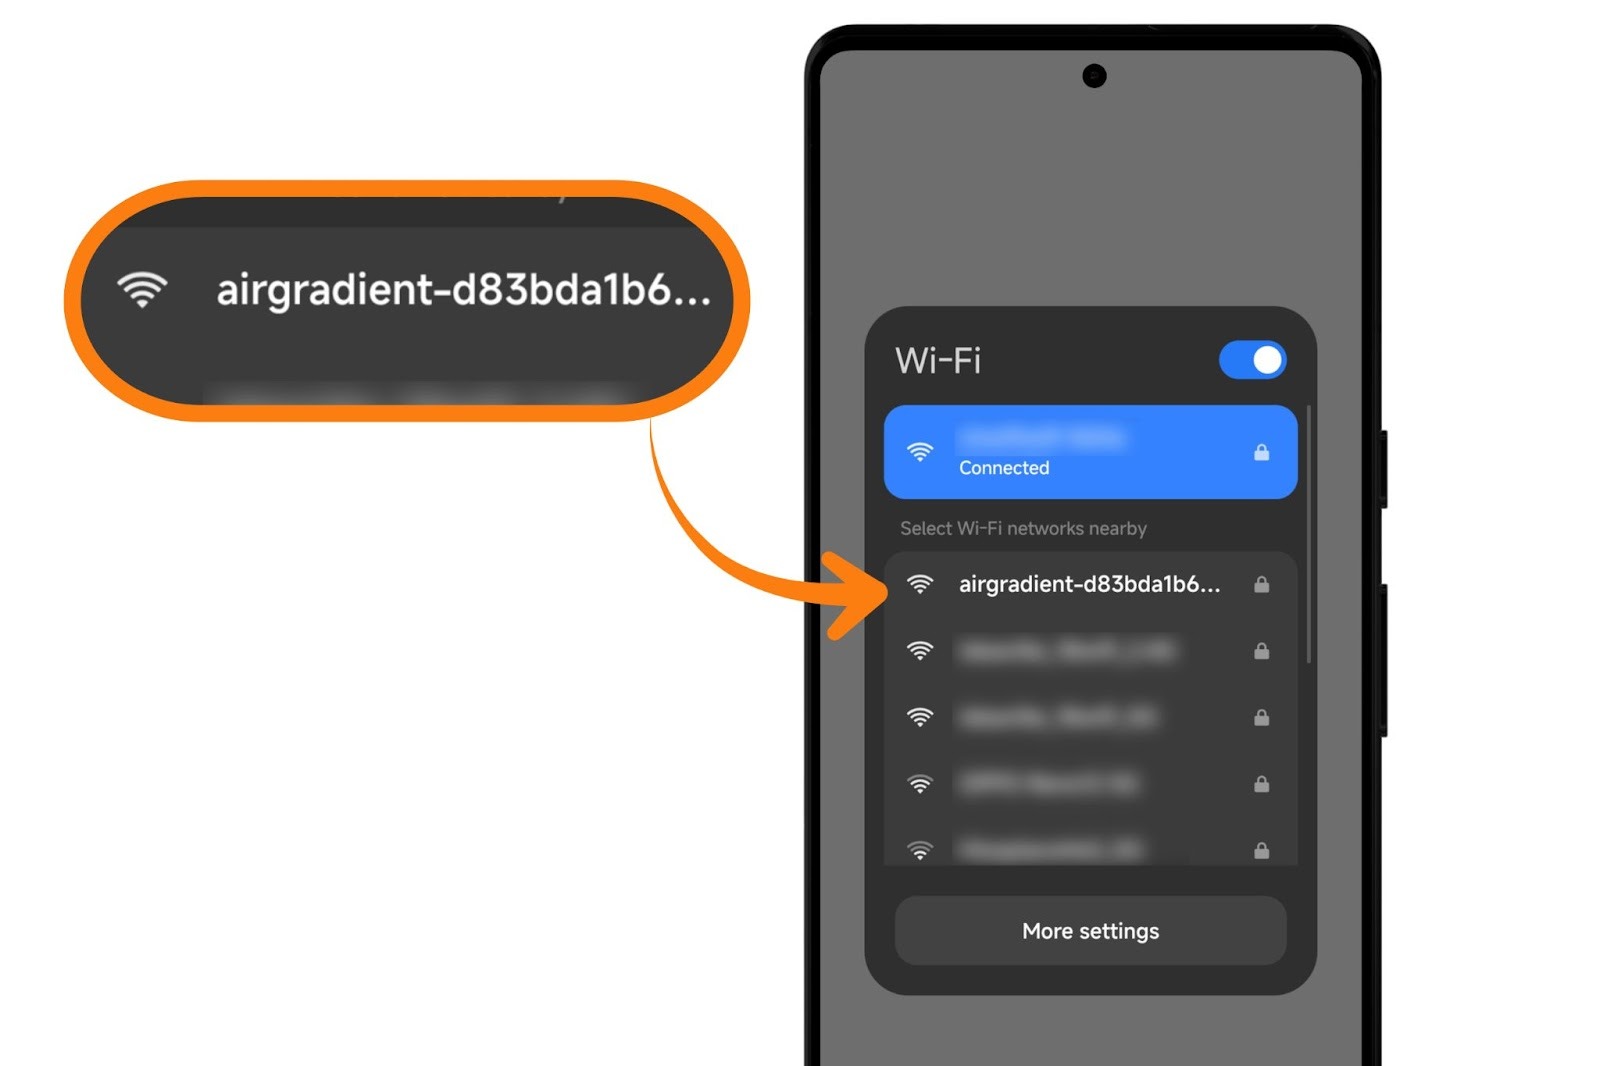
-
Enter the password:
cleanair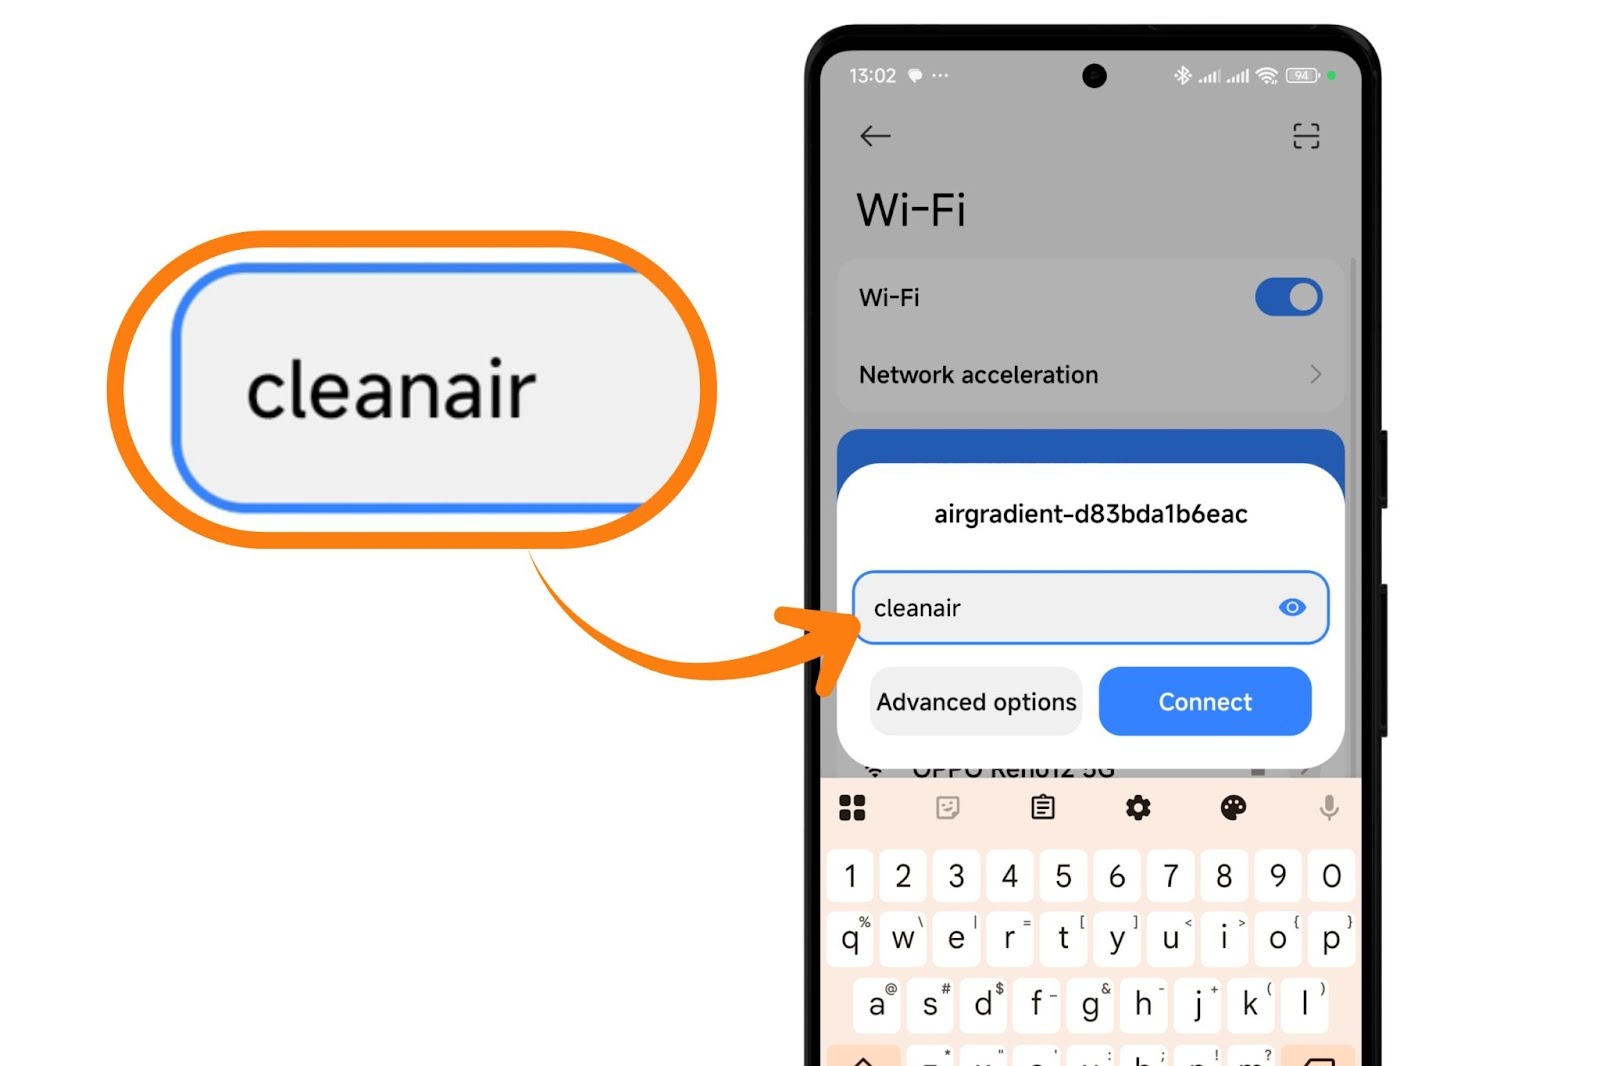
Android notes
-
Android 11/12 may show Manage router → tap it.
-
Some versions require tapping “Tap here to sign in to network” to open the WiFi Manager.
1.3 Open the WiFi Manager
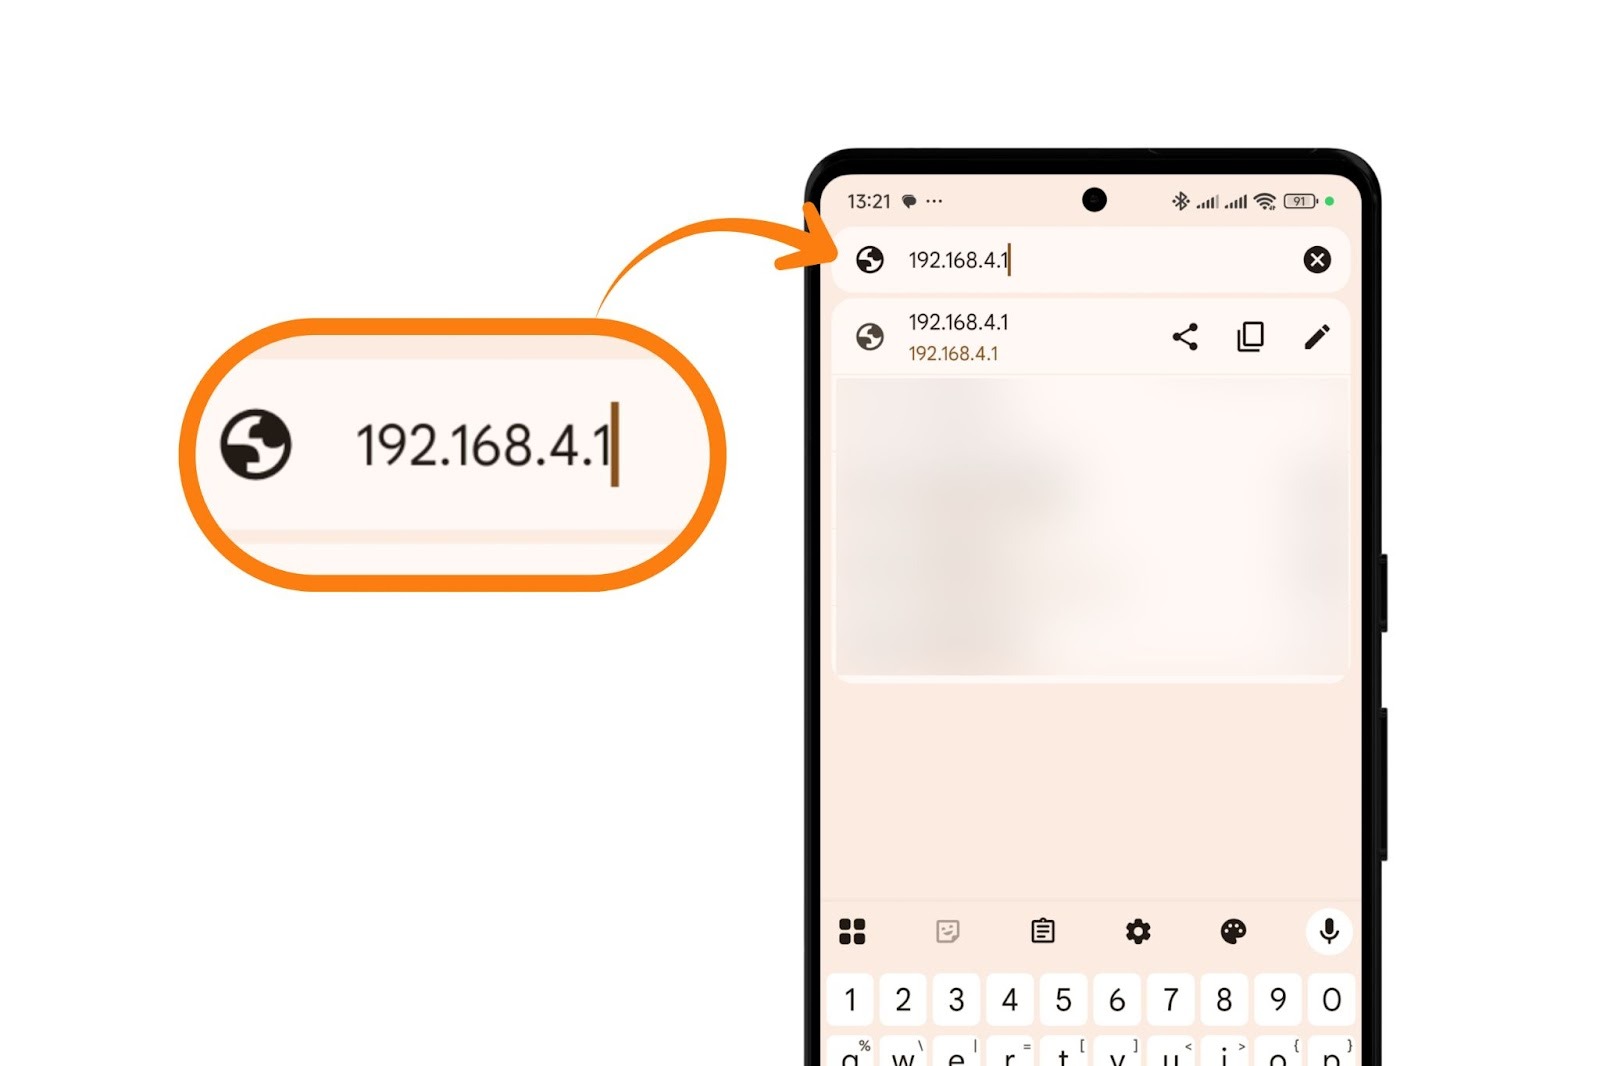
Once connected to the hotspot, the WiFi Manager should open automatically within ~10 seconds.
If it doesn’t:
-
Open a browser.
-
Go to: 192.168.4.1
(Enter it in the address bar, not a search engine.)
-
Make sure you are still connected to the device hotspot. Turn off mobile data while you’re connected to the device hotspot as it may cause the smartphone to temporarily switch to mobile data instead of maintaining the device hotspot connection.
1.4 Configure Your WiFi Network
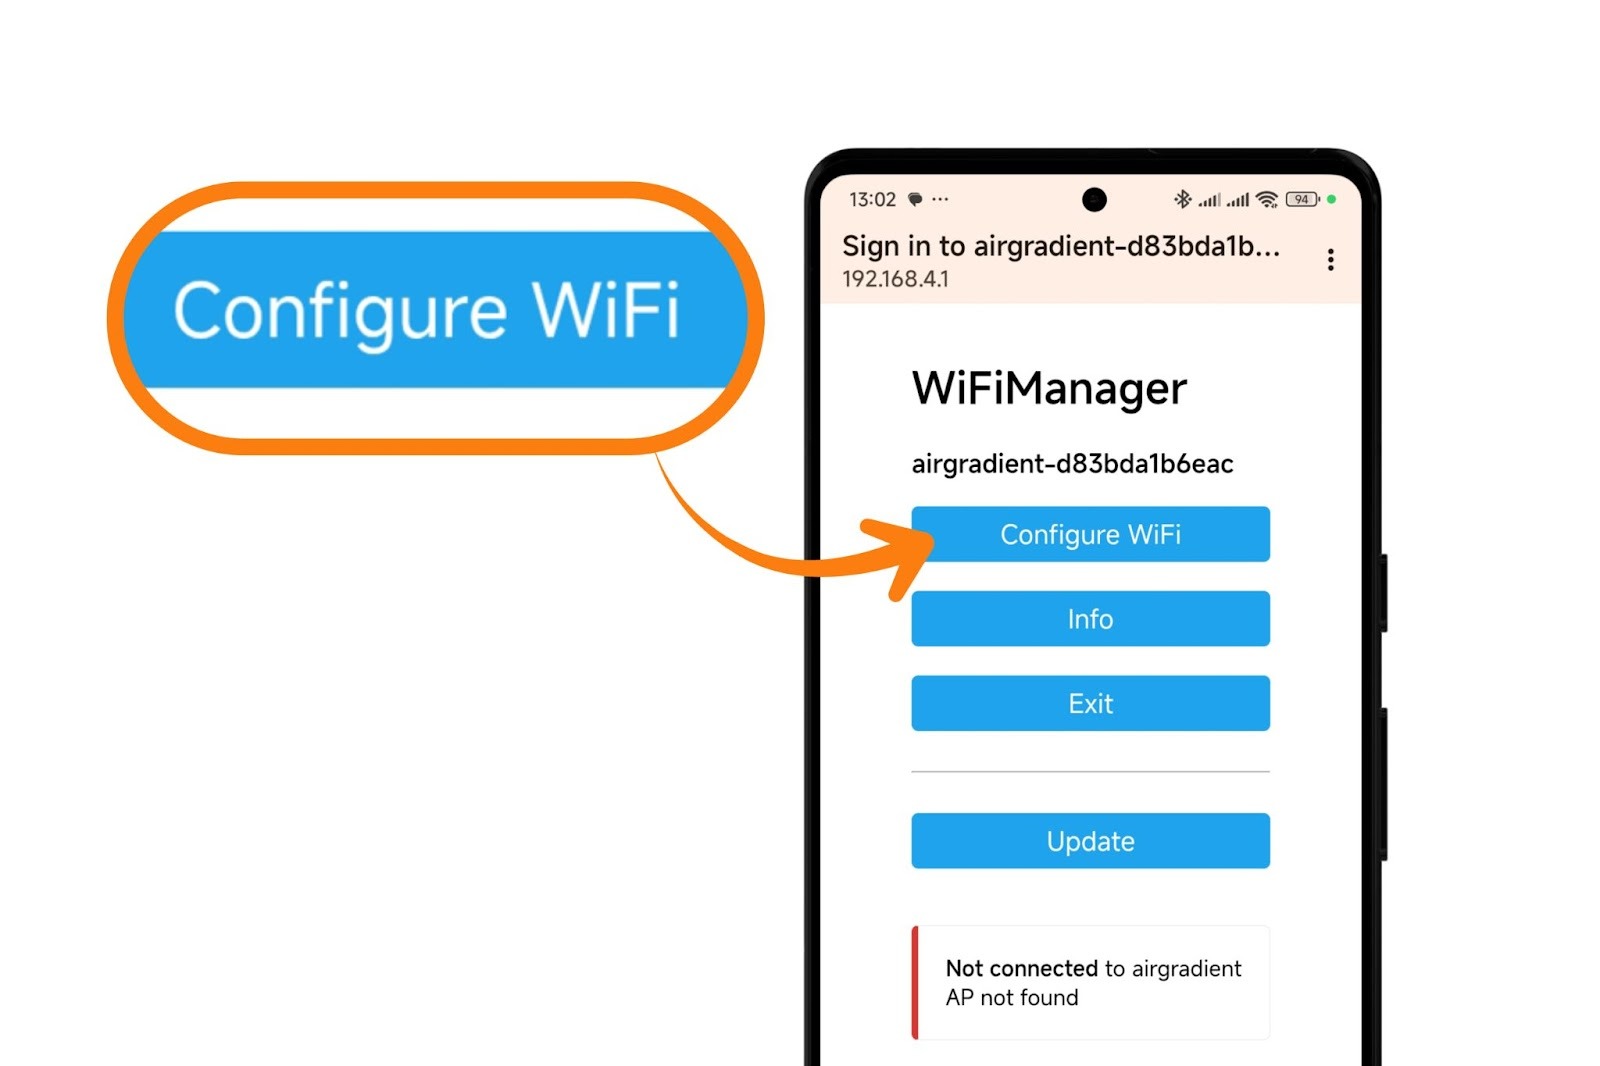
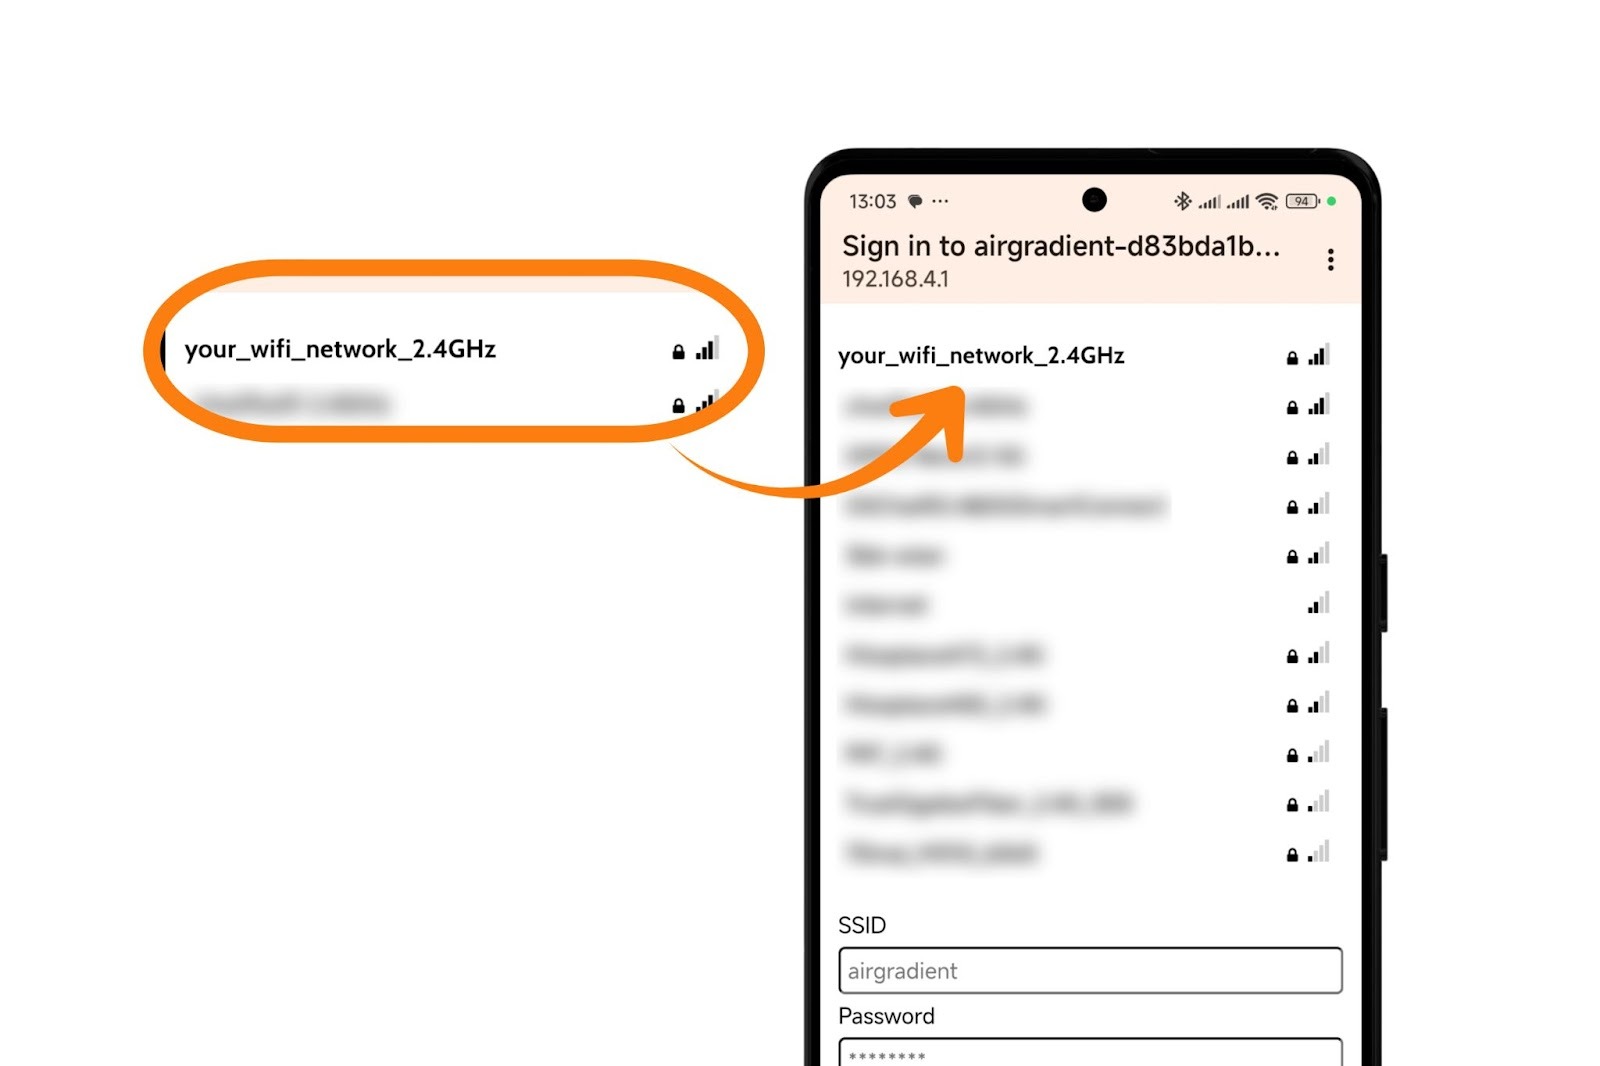
On the WiFi Manager page:
-
Tap Configure WiFi
-
Select your WiFi network
-
Enter your WiFi password
(This should be your router password, not “cleanair”.)
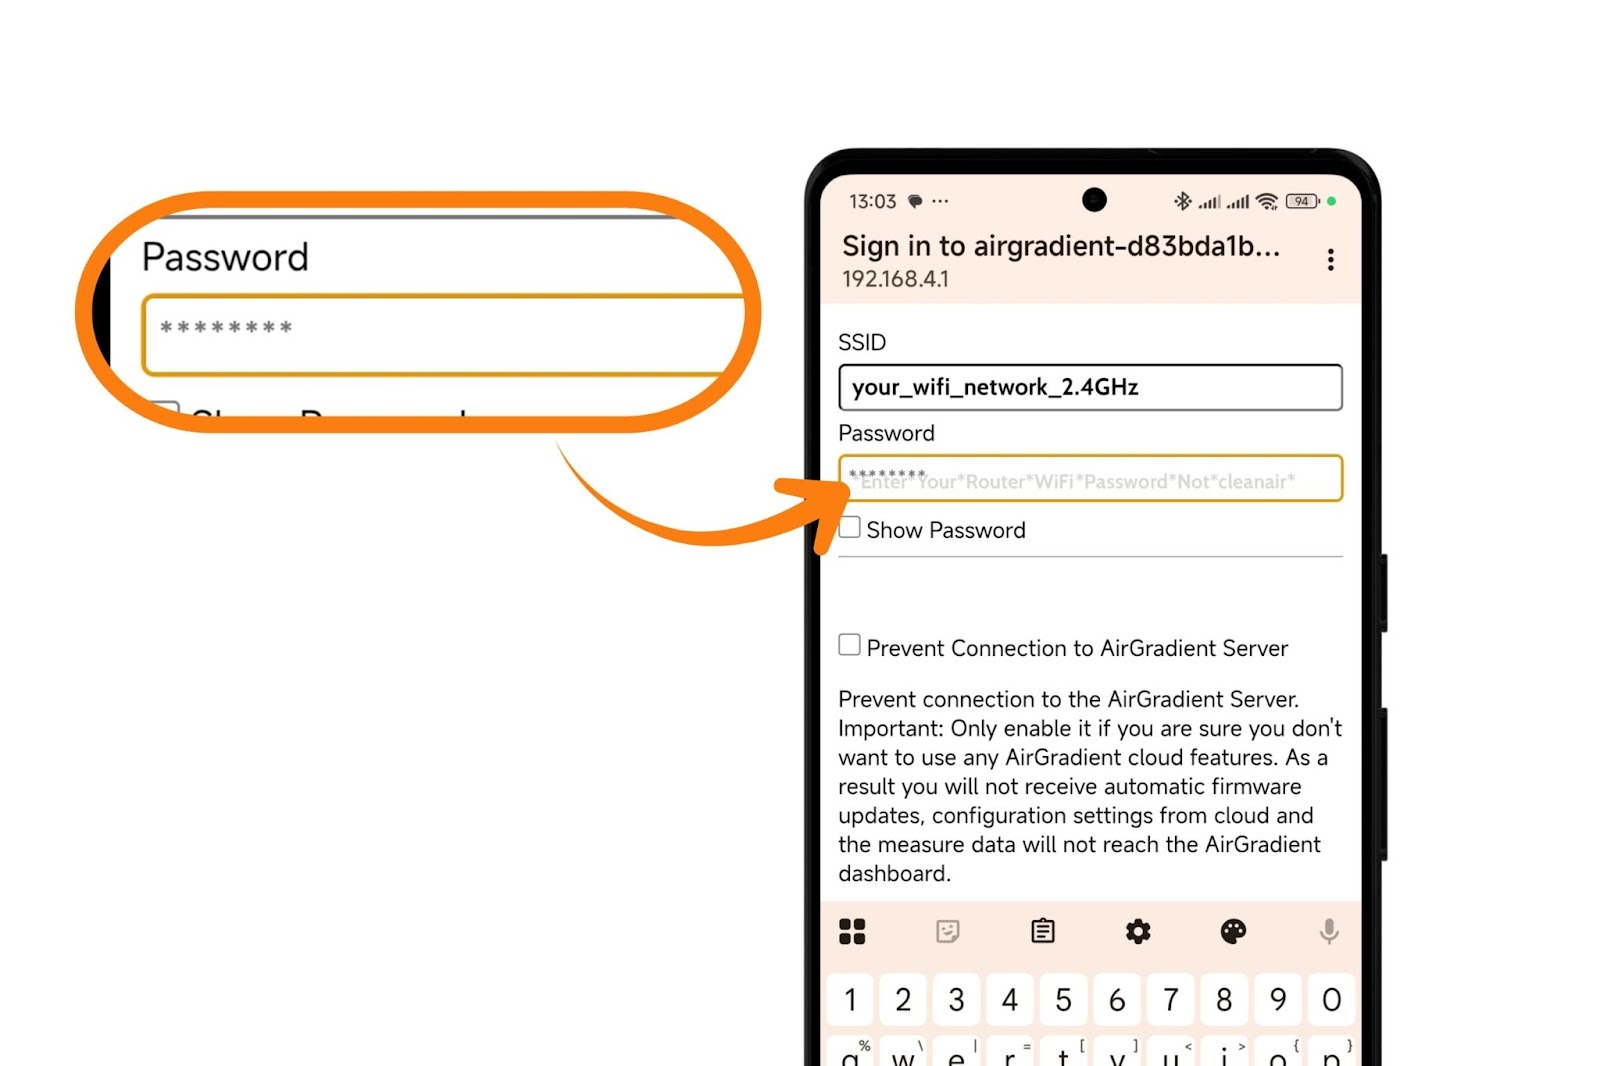
-
Ensure “Prevent connection to AirGradient servers” is unchecked, if you want the devices to connect to the AirGradient dashboard and receive automatic firmware updates.
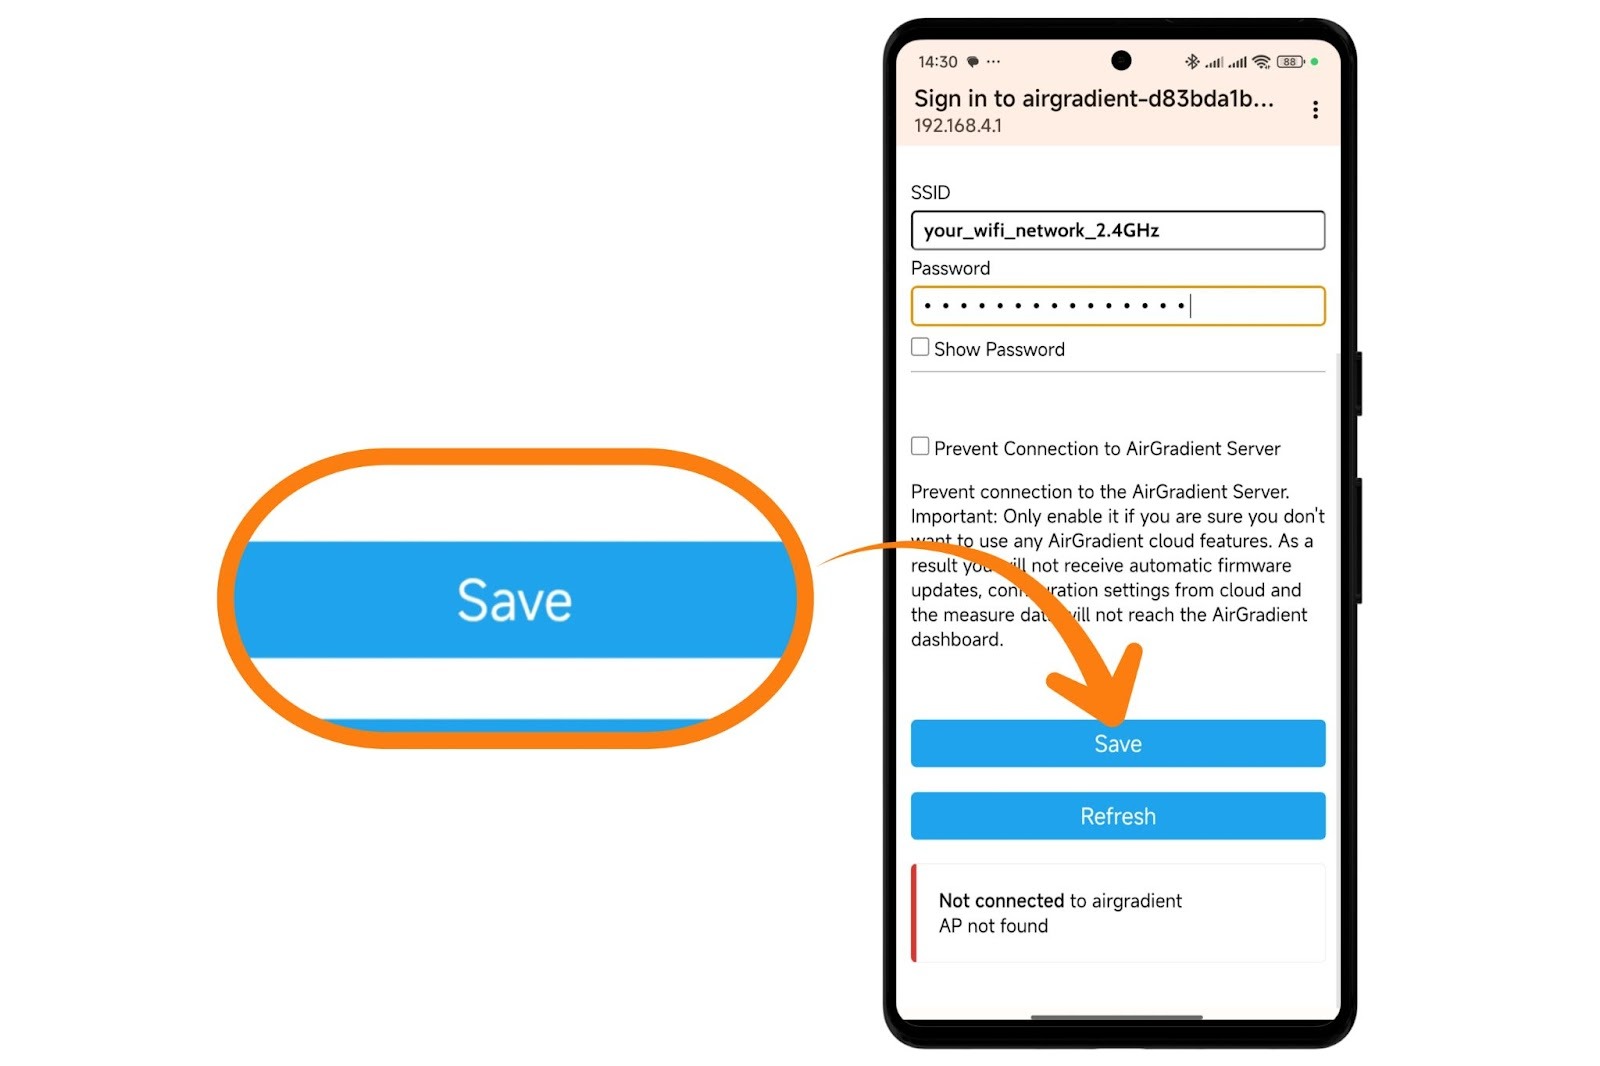
-
Tap Save
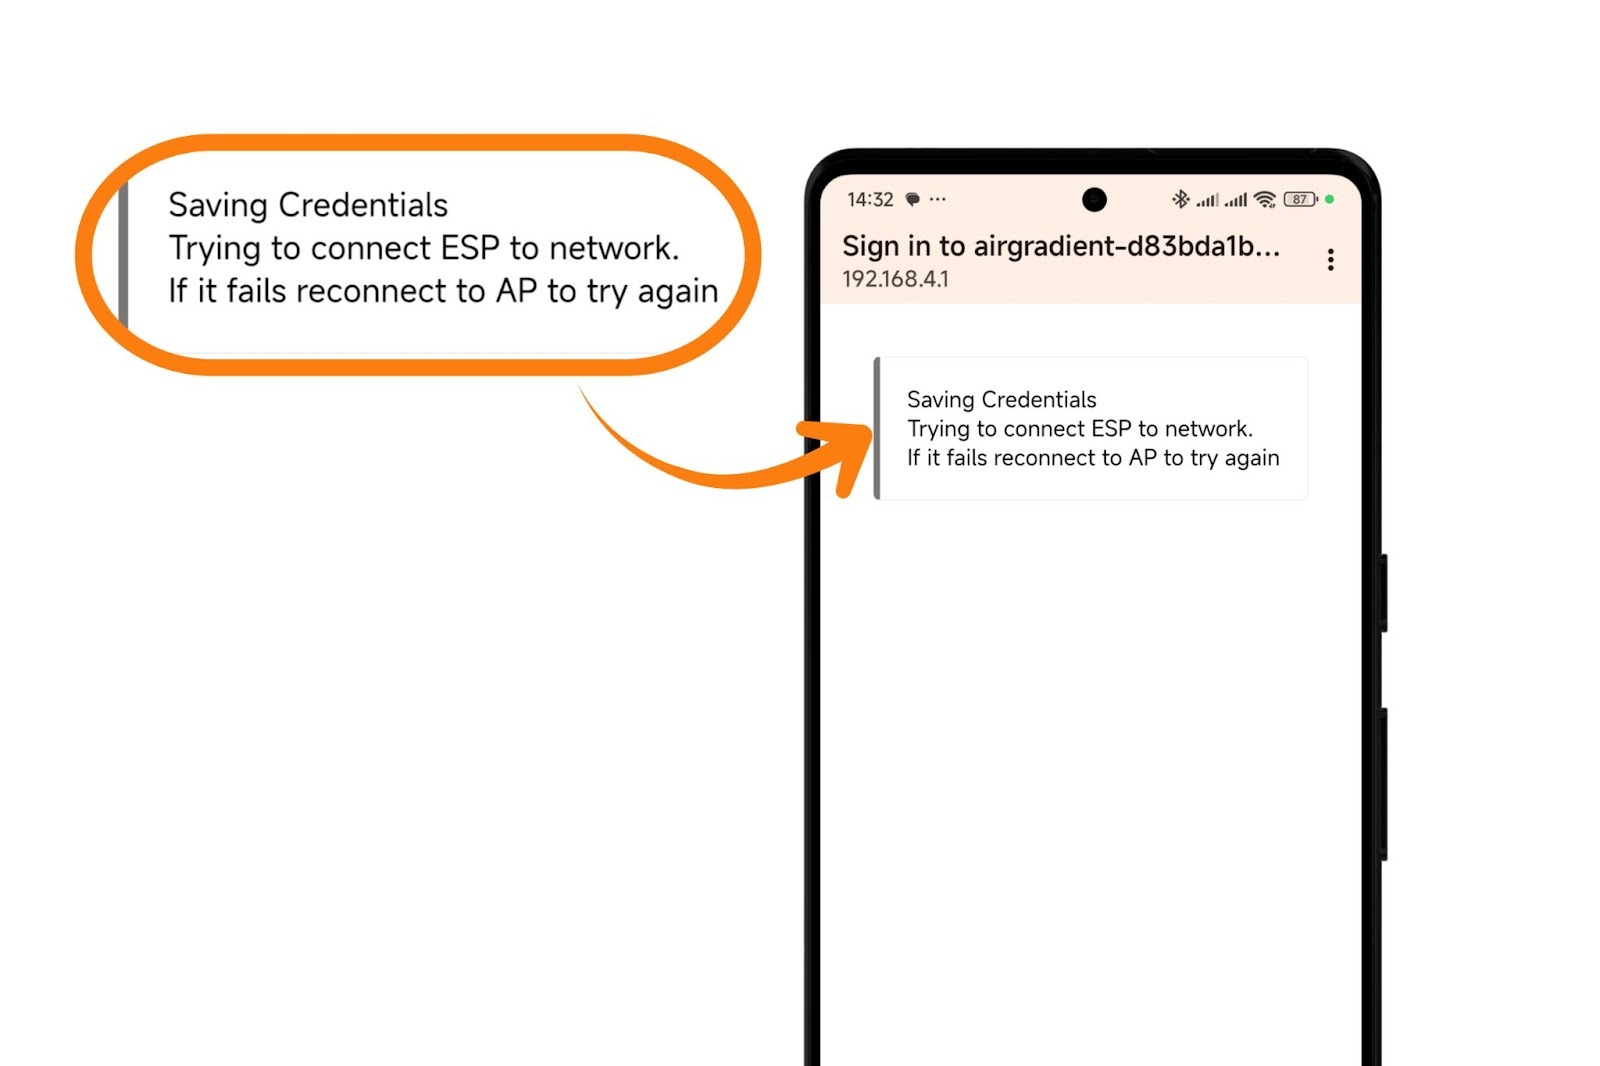
1.5 Credential Saving & Expected Behavior
You’ll see:
“saving credentials…”
Stay on this page. Do not disconnect.
-
If the password is correct → the window closes automatically.
-
If incorrect → you are returned to the network list.
-
If the captive portal times out → the device reboots.
Reconnect to the hotspot and start again. -
If the window closes without showing “saving credentials…” → it still means success.
“No Internet Connection” warnings: Totally normal. Stay connected to the hotspot until the process completes.
Next Steps After Connecting
Your AirGradient ONE will now connect to WiFi and start transmitting data.
To link it to your dashboard:
Frequently Asked Questions
Can the AirGradient ONE use 5GHz WiFi?
No. The ONE only supports 2.4GHz.
The hotspot doesn’t appear. What now?
Reset the device and try again. Ensure you are close to the monitor.
Which network types are not supported?
-
WPA Enterprise
-
Captive portals
What is the device hotspot password?
cleanairThe WiFi Manager screen didn’t appear.
Go to 192.168.4.1 in your browser (while connected to the hotspot). Turn off mobile data while you’re connected to the device hotspot as it may cause the smartphone to temporarily switch to mobile data instead of maintaining the device hotspot connection.
My phone says “no internet connection” when connected to the hotspot.
Ignore it. This is expected and does not affect setup.
The monitor won’t connect to WiFi.
Check:
-
Correct WiFi password
-
Network is 2.4GHz
-
No firewall blocking devices
Then retry the setup.
The captive portal timed out.
The monitor restarts automatically. Reconnect and repeat the process.