
Particulate Matter (PM) Sensor Calibration Guide
Fully Assembled Monitors
Starting October 2025 and onwards, every fully assembled AirGradient monitor is individually calibrated against a reference-grade instrument at the factory using our Test Report V2 procedure. Based on this testing, a device-specific scaling factor and offset are calculated for the PM sensor.
These calibration parameters are tied to the sensor’s serial number and are automatically applied when you register your device in the AirGradient dashboard. This is what you see as Factory Calibration in the dashboard.
In practical terms, this means:
-
Each monitor is calibrated individually, not by batch.
-
Calibration is based on comparison with a reference-grade instrument (PALAS)
-
The correct calibration is automatically applied when the device is added to your dashboard
Viewing Your Factory Calibration Report
You can view the calibration details and test results for your specific device go to: Dashboard > Locations > Admin > Retrieve Factory Test Report
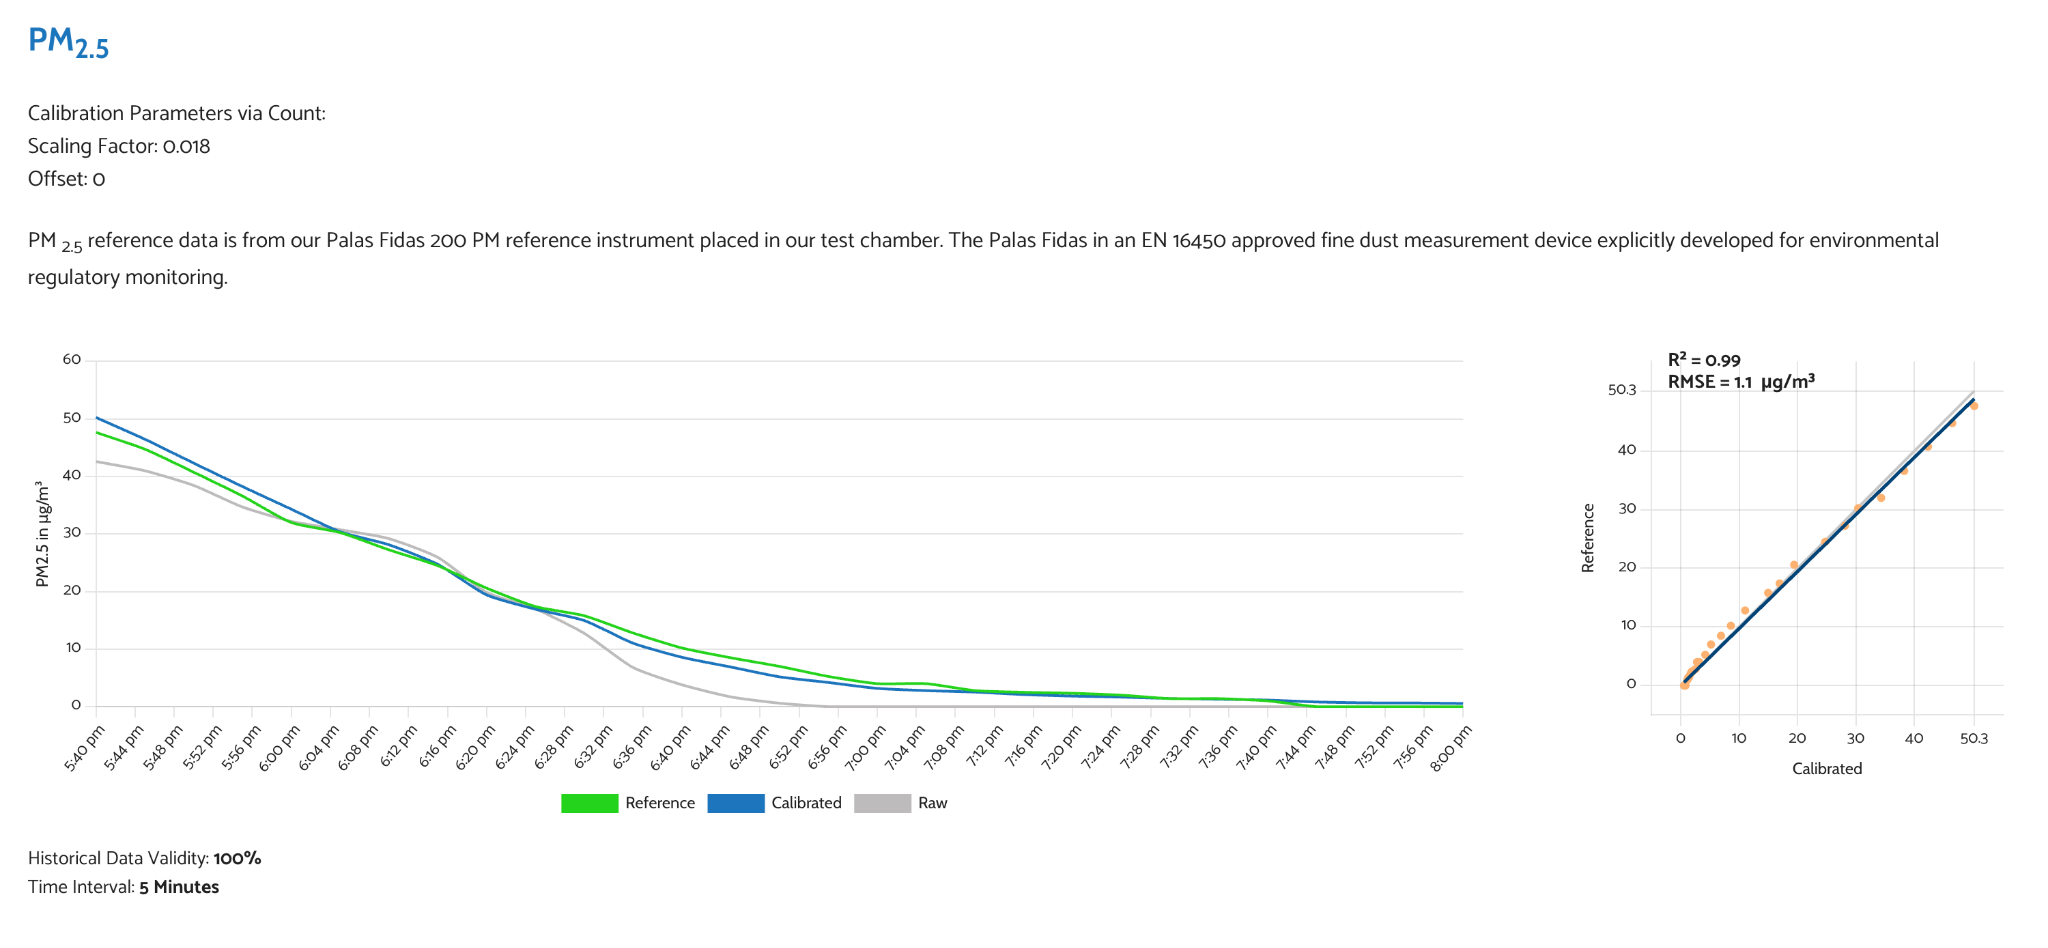
Here you will find:
-
The scaling factor and offset calculated for your PM sensor
-
A test graph showing:
-
Raw sensor data
-
Calibrated data
-
Reference instrument data
-
This gives full transparency into how your device was calibrated. Detailed guide: Where can I find the factory test report for my AirGradient monitor?
Managing PM Calibration Settings for Fully Assembled Monitors
Factory Calibration is selected by default.
You also have the option to remove or change it, but this is generally not recommended.
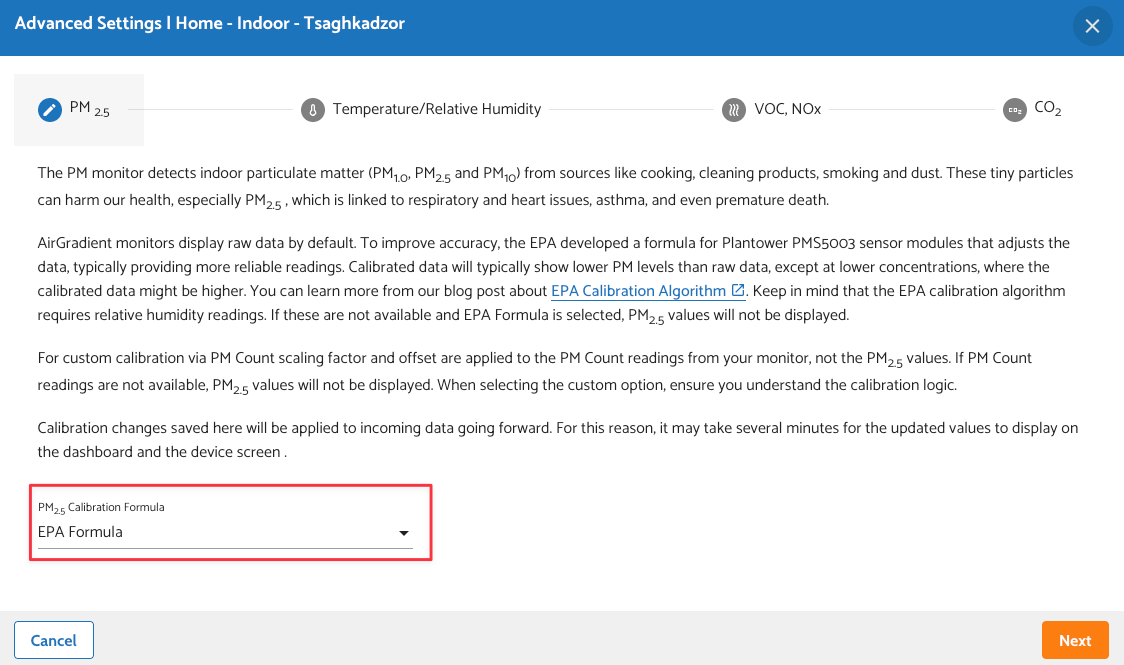
The current calibration method will also be displayed there.
DIY Kits and Pre-Factory Calibration Assembled Devices
Since DIY kits are assembled by the user, they do not go through factory calibration. As a result, the PM data you see initially is raw sensor output, which can vary in accuracy.
To improve this, you should apply correction formulas.
EPA Correction (Recommended Default)
The most widely used correction is the U.S. EPA correction formula, designed specifically for Plantower PM sensors.
This formula adjusts raw readings to better match reference-grade instruments under typical environmental conditions. It compensates for known sensor biases and improves accuracy across a wide range of environments. This is the recommended baseline if you don’t have your own reference instruments to calibrate with.
You can learn more here:
In most cases, applying the EPA formula is enough to get reliable data from a DIY unit.
Batch-Specific Correction (When Needed)
Some Plantower PM sensor batches show consistent deviations in their raw readings at low PM levels. See full explanation here: Enhance the Accuracy of the PMS Sensors
In these cases, an additional batch-specific correction may be required to enhance the accuracy of the PM sensor at low levels.
We have developed a range of batch-corrections for the PM sensors used in our monitors which help to improve accuracy and precision. To apply these batch corrections, you will need to know the first eight digits of the PM sensor's serial number.
How to find your PM sensor’s batch number
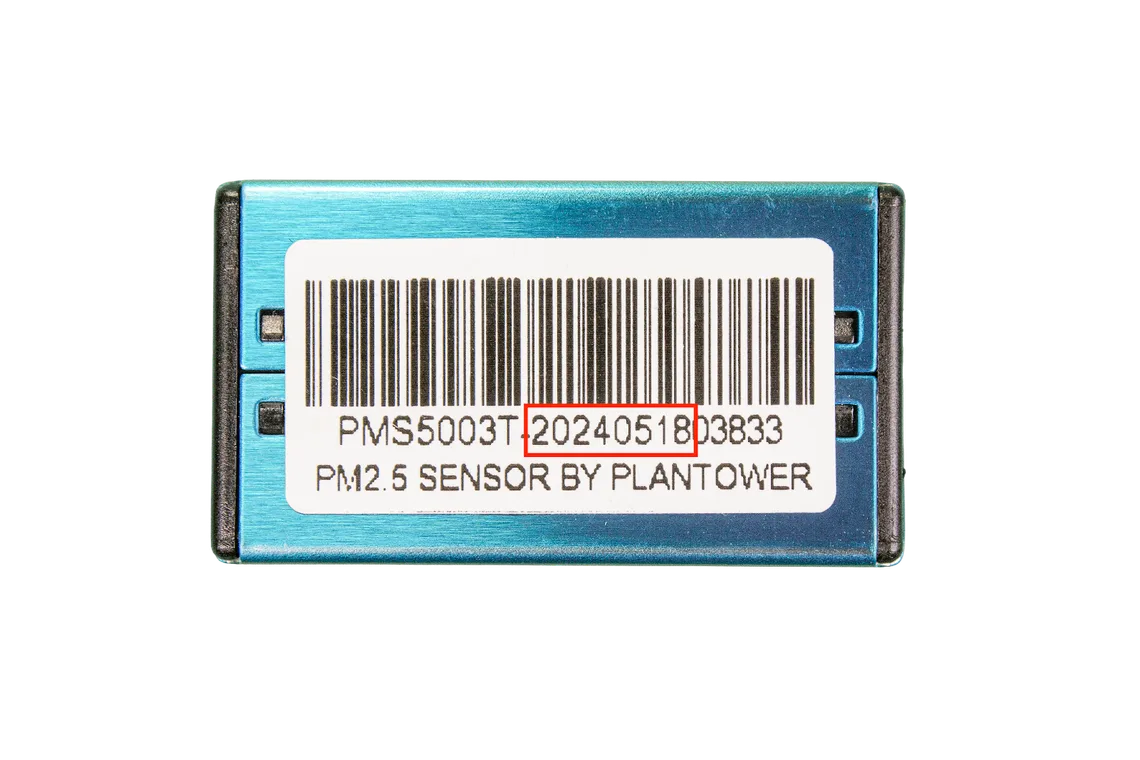
To find the batch number, please look at the blue PM module. Each sensor has a sticker like the image above.
To avoid needing to open the monitor at a later date, please note down or take a photo of this number during assembly.
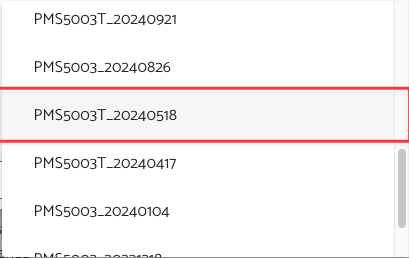
In the dashboard, you can then select the appropriate batch correction formula that matches your sensor’s serial number. For example for the sensor in the image above, the correct batch correction formula would be:
Applying corrections correctly
Batch-specific correction, described above, aligns your sensor with earlier, “classic” Plantower sensor behavior at lower PM levels. Batch specific corrections are essentially a calibration against an older Plantower sensor before the batch issue occurred. If you haven’t read the article linked above, please do so for more context: Low Readings from Plantower PMS5003
Once all sensors behave consistently, you can then improve accuracy.
This is where the EPA Formula comes in.
The EPA correction is based on comparisons with reference-grade instruments and is designed to improve real-world accuracy.
Therefore, for sensors that require batch correction, the correct approach is:
-
Apply the batch-specific correction
-
Then apply the EPA correction on top

Why this differs from factory-calibrated devices
For fully assembled monitors with factory (monitor-specific) calibration, the devices are individually calibrated against a reference instrument.
Because of this, EPA correction should not be applied on top of factory calibration, as it would effectively double-correct the data.
Managing PM Calibration Settings For DIY Kits
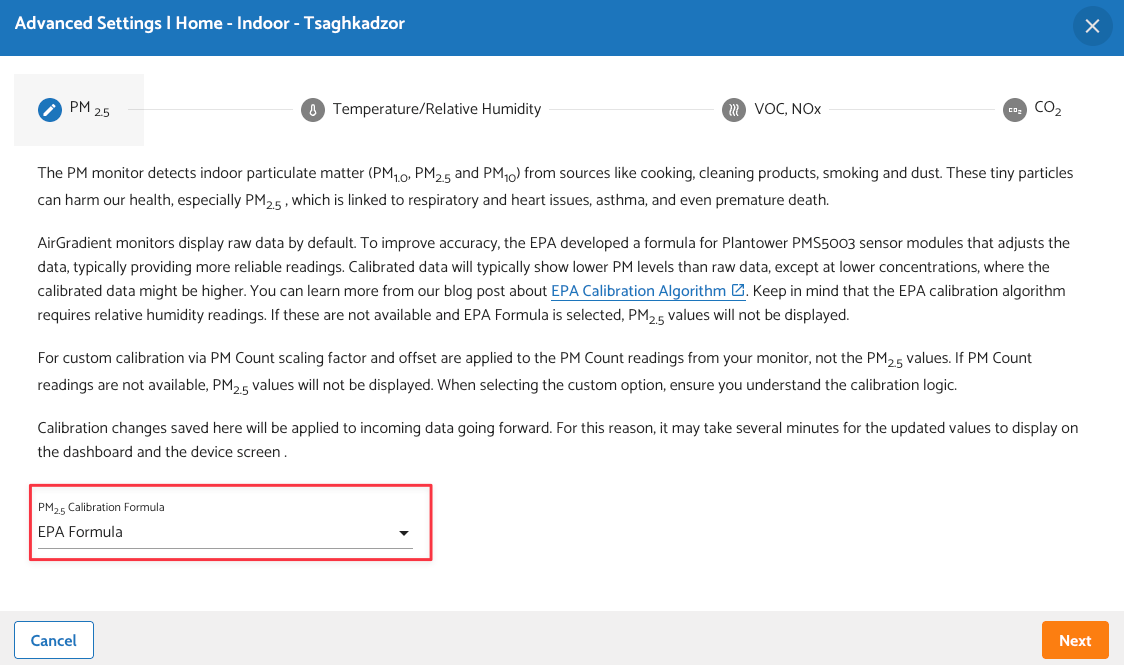
The current calibration method will also be displayed there.
No comments to display
No comments to display